
Start Well.
Grow Beautifully.
A practical guide to sowing and growing your seeds with confidence.
Every seed variety has its own preferences, but strong plants begin with the same foundations: the right soil, consistent moisture, and patience.
Start with the general guide below, then find your specific variety for detailed instructions.
How to Start Seeds: A Complete Seed Sowing Guide
Starting plants from seed is one of the most rewarding parts of gardening. It allows you to grow unique varieties, save money, and produce stronger, more resilient plants adapted to your space.
Whether you are starting a few trays on a windowsill or scaling up production under grow lights, this guide will walk you through everything you need to know.
Why Start Plants from Seed?
Growing from seed gives you:
Access to uncommon varieties not available at garden centers
Healthier plants that transition better into your soil
The ability to grow in greater volume at lower cost
Control over soil, inputs, and growing practices
It also allows you to grow plants at the right time for your climate instead of relying on what happens to be in stock locally.
Essential Seed Starting Supplies
You do not need an elaborate setup to start seeds, but having the right tools makes a major difference.
Recommended supplies:
Seed starting mix (preferably peat-free)
72-cell trays
Deep cell trays (50-cell or similar) for deep-rooted plants
Solid bottom trays for watering
Open drainage trays to sit inside solid trays
Humidity domes (highly recommended)
Small pots (3–4 inch) for potting up
Vermiculite
Blue masking tape and permanent marker for labeling
Spray bottle (light to medium spray)
Fine mist sprayer (olive oil-style mister)
Grow lights (tabletop or hanging)
Optional: heat mat
Optional: soil blocker
You can begin with very little, but these tools make germination more reliable and consistent.
Choosing the Right Seed Starting Mix
Always begin with a light, well-draining seed starting mix.
Seed starting mix is different from potting soil. Potting soil is heavier, often contains added fertilizer, and can stay too wet for delicate seedlings.
Look for:
Fine texture
Good drainage
Peat-free options when possible
Peat harvesting has environmental impact, and there are now excellent peat-free blends available. You can also make your own mix using compost, coconut coir, perlite, and vermiculite.
How to Sow Seeds Indoors
1. Prepare Your Trays
Fill cells or flats loosely with seed starting mix. Gently level the surface without compacting heavily.
Pre-moisten the mix before sowing so it is evenly damp but not dripping wet.
2. Seed Spacing
As a general rule:
Space seeds about four seed-widths apart.
Tiny seeds can be sown 4–6 per cell.
Medium to large seeds can be sown 2–3 per cell.
This allows you to thin later without overcrowding.
3. Depth Matters
Follow the seed packet instructions carefully.
Tiny seeds (like foxglove) require light to germinate and should be surface sown.
Medium and large seeds should generally be covered with soil to a depth about twice their size.
For surface-sown seeds, a light dusting of vermiculite can help hold moisture without blocking light.
Watering Seedlings Properly
Watering is where most beginners struggle.
Before true leaves form, bottom watering is best. Fill the solid tray beneath your cell tray and allow moisture to wick upward.
Use:
A spray bottle for light to medium surface moisture
A fine mister for very small seeds that should not be disturbed
Seedlings should remain evenly moist but never soggy.
Humidity and Germination
Humidity domes are strongly recommended during germination. They:
Maintain consistent moisture
Increase germination success
Reduce daily watering stress
Remove the dome as soon as most seedlings emerge to prevent fungal issues.
Temperature and Light
Most seeds germinate best between 65–75°F.
A heat mat can improve germination speed for warm-season crops.
Once seedlings emerge, they require strong light immediately.
Grow lights dramatically improve success. Lights should hang just a few inches above seedlings and run 14–16 hours per day.
For scaling up, a baker’s rack fitted with grow lights is an efficient and space-saving solution.
Group trays by similar plant size to simplify light adjustments and watering.
When to Pot Up Seedlings
Some plants can be transplanted directly from a 72-cell tray into the garden.
Examples:
Snapdragons
Many hardy annual flowers
Others require potting up at least once:
Tomatoes
Peppers
Foxglove
Larger perennials
Move seedlings into 3–4 inch pots when roots fill the cell but before they become rootbound.
Use a quality potting mix for this stage.
Pinching for Stronger Plants
Many annual flowers benefit from pinching once they reach about 6 inches tall. Pinching encourages branching and more blooms.
Do not pinch:
Poppies
Foxglove
Celosia
Single-stem stock
Always check the specific plant’s growth habit before pinching.
Direct Sowing Seeds Outdoors
Some seeds perform better when sown directly into the garden.
Prepare soil by loosening and removing weeds. Rake smooth before sowing.
For tiny seeds like poppies or foxglove, mix seeds with a small amount of sand to distribute evenly.
After seedlings establish, a light layer of organic mulch can help conserve moisture and suppress weeds.
Thin seedlings according to spacing recommendations once they are large enough to handle.
Cold Stratification and Winter Sowing
Some seeds require a period of cold to germinate.
Options include:
Refrigerating seeds in a damp medium inside a sealed bag
Winter sowing in milk jugs outdoors
Placing trays in an unheated garage
Follow species-specific instructions carefully.
Soil Blocking Method
Soil blocking is an environmentally friendly alternative to plastic trays.
Benefits:
No plastic cells required
Roots air prune naturally
Easy transplanting
Use a soil blocking mix that holds structure but remains light and well-draining.
Keep blocks consistently moist and monitor closely during germination.
This method works well for many annuals and vegetables, but very tiny seeds (like foxglove) are typically easier to manage in trays or flats.
Scaling Up Seed Production
If you plan to grow at higher volume:
Invest in strong grow lights
Use shelving or baker’s racks
Organize trays by germination timing
Group fast growers separately from slow growers
Plan ahead so you have potting-up space ready before seedlings outgrow their cells.
Seed Storage Best Practices
Store unused seeds in:
A cool
Dark
Dry location
One option is using a photo storage box with a silica packet inside to reduce moisture exposure.
Proper storage extends seed viability and preserves germination rates.
What to Expect
Seed starting is part science, part observation.
Some seeds germinate quickly. Others take patience.
Not every tray will be perfect, but consistency, good soil, proper light, and careful watering will dramatically improve your success.
The more you sow, the better you become.
Detailed Sowing Instructions
-
Double White Columbine
Direct Sow or Start Indoors?
Both methods are successful.
For earliest blooms, start indoors 8–10 weeks before last frost. Cover lightly with soil.
Aquilegia benefits from cold stratification. Sow outdoors in fall or refrigerate seeds for 2–3 weeks before indoor sowing.
Germination occurs in 14–28 days.
Transplant carefully while young.
Zones
USDA Zones 3–8
Short-lived perennial.Sun Exposure
Full sun to part shade.
In warmer climates, afternoon shade is beneficial.Mature Size
Height: 24–30 inches
Width: 12–18 inchesAiry, branching habit.
Spacing
Space 12–18 inches apart.
Pinching
Pinching not required.
Deadhead to encourage extended bloom and reduce excessive self-seeding.Potting Up & Transplanting
Pot up if needed before planting outdoors. Avoid disturbing roots once established.
Design Notes
‘White Barlow’ features double, star-like blooms without the traditional columbine spurs, giving it a softer, almost pompon-like appearance.
It pairs beautifully with:
• Foxglove
• Spring bulbs
• Ferns
• Shade-loving perennialsExcellent for cottage gardens and woodland edges.
Pollinator Value
Attracts bees and hummingbirds.
Toxicity
May be toxic if ingested. Keep away from pets and children.
Common Mistakes to Avoid
• Skipping stratification
• Overcrowding
• Expecting long-lived perennial behaviorColumbine often behaves as a short-lived perennial but reseeds gently.
What to Expect
Blooms in late spring to early summer.
May self-seed lightly in favorable conditions. -
Cosmos bipinnatus ‘Sonata White’
Dwarf White Cosmos
Direct Sow or Start Indoors?
Direct sowing is preferred.
Cosmos germinates quickly and resents root disturbance, making it ideal for sowing directly into prepared garden soil after danger of frost has passed.
If starting indoors, sow 3–4 weeks before last frost and transplant carefully while young.
Sow seeds ¼ inch deep in well-drained soil. Germination occurs in 7–14 days.
Cosmos thrives in warmth and full sun. Do not overwater during early growth.
Zones
Grown as an annual in Zones 2–10.
Sun Exposure
Full sun is essential for strong stems and abundant blooms.
Mature Size
Height: 18–24 inches
Width: 12–18 inchesCompact and well-branched compared to taller cosmos varieties.
Spacing
Space 10–12 inches apart.
Good airflow improves flowering and stem strength.Pinching
Pinch young plants at 8–10 inches tall to encourage branching and increase flower production.
Potting Up & Transplanting
If started indoors, transplant before roots become crowded. Harden off before planting outside.
Cosmos grows quickly and does not require potting up if timed properly.
Design Notes
‘Sonata White’ carries luminous white blooms with golden centers on compact plants — perfect for borders, containers, and cutting gardens.
It reads clean and bright in white-themed plantings and pairs beautifully with:
• Foxglove
• Nigella
• Eryngium
• White phlox
• Soft blush or pale peach tonesBecause it blooms continuously from early summer until frost, it fills the mid-to-late season gap gracefully.
Pollinator Value
Attracts bees and butterflies throughout the growing season.
Toxicity
Not known to be toxic to humans or pets.
Common Mistakes to Avoid
• Over-fertilizing (results in excessive foliage and fewer blooms)
• Planting in shade
• Overwatering young plantsCosmos performs best in lean, well-drained soil.
What to Expect
Blooms begin in early summer and continue until frost. Deadheading encourages even more flowering.
Self-seeding may occur lightly in favorable conditions.
-
Sea Holly
Direct Sow or Start Indoors?
Eryngium can be direct sown, but for strongest results and more predictable germination, starting indoors is recommended.
Seeds benefit from cold stratification. For best results:
• Sow outdoors in fall and allow natural winter conditions to break dormancy, or
• Refrigerate seeds in a moist medium for 2–4 weeks before indoor sowing.After stratification, sow indoors 8–10 weeks before last frost. Cover lightly with soil, as darkness aids germination.
Germination may take 14–28 days and can be irregular. Patience is part of growing sea holly.
Eryngium dislikes root disturbance, so transplant while young and avoid over-handling.
Zones
USDA Zones 5–9
Short-lived perennial or biennial depending on climate.Sun Exposure
Full sun is essential.
Poor flowering and weak stems result from shade.Mature Size
Height: 24–36 inches
Width: 12–18 inchesArchitectural, upright, and airy.
Spacing
Space 12–18 inches apart.
Excellent airflow prevents mildew and promotes strong stems.Potting Up & Transplanting
Transplant while seedlings are still small.
Eryngium develops a taproot and resents root disturbance once established.Plant into well-draining soil. Avoid overly rich conditions.
Design Notes
‘Miss Willmott’s Ghost’ carries silvery-white bracts that glow against darker foliage. It reads almost translucent in evening light.
The name comes from the legendary English gardener Ellen Willmott, who was known for secretly scattering eryngium seeds in friends’ gardens. When the plants appeared unexpectedly, they were said to be her “ghost.”
This plant brings structure and lightness simultaneously. It pairs beautifully with:
• White cosmos
• Nigella
• Lavender
• Ornamental grasses
• Soft blush or apricot bloomsExcellent in cutting gardens and dries beautifully.
Pollinator Value
Highly attractive to bees and beneficial insects.
Toxicity
Not considered toxic to humans or pets, but the spiny texture can be sharp. Handle with care.
Common Mistakes to Avoid
• Skipping cold stratification
• Planting in heavy or poorly draining soil
• Over-fertilizing (this weakens stems)Sea holly prefers lean soil and bright sun.
What to Expect
Year One: Foliage establishment.
Year Two: Striking, silvery-white blooms with a sculptural presence.Once established, it may gently self-seed in well-drained soil.
-
Direct Sow or Start Indoors?
While foxglove can be direct sown with success, starting indoors produces stronger, more uniform plants — especially if you’re building a designed border.
For spring blooms the following year:
Start indoors 8–10 weeks before your last frost date, or
Sow indoors in early July (a midsummer sowing allows plants to establish and overwinter beautifully).
Seeds require light to germinate. Surface sow onto pre-moistened seed starting mix and press gently into the soil. Do not cover.
Keep evenly moist. Germination typically occurs in 14–21 days.
If direct sowing, scatter thinly onto prepared soil in late spring or summer and keep the area consistently moist.
Foxglove is a biennial or short-lived perennial. Expect foliage the first season and blooms the following year.
Zones
USDA Zones 4–8
Performs as a biennial or short-lived perennial depending on climate.Sun Exposure
Full sun to part shade.
In warmer climates, light afternoon shade is beneficial.Mature Size
Height: 30–36 inches
Width: 12–18 inchesTall, upright flower spires create vertical rhythm in borders.
Spacing
Space plants 12–18 inches apart.
Foxglove appreciates airflow and room to develop strong basal growth.Potting Up & Transplanting
Seedlings can be started in trays and transplanted once they form several true leaves. Pot up into small containers if needed before planting outdoors.
Harden off before transplanting.
Fall-planted seedlings often produce the strongest flowering plants.
Design Notes
‘Snow Thimble’ carries fully double white blooms that read as luminous in evening light. It pairs beautifully with:
– White cosmos
– Nigella
– Soft pink or apricot tulips
– Airy grasses
– Cottage-style rosesIt thrives in layered borders where it can rise through mid-height companions.
Because it self-seeds modestly, it often returns in gentle drifts without becoming invasive.
Pollinator Value
Foxglove attracts bees and other pollinators. The double form may be slightly less accessible than single varieties but still provides garden interest and ecological value.
Toxicity
All parts of foxglove are toxic if ingested.
Keep away from pets and small children.Common Mistakes to Avoid
– Covering seeds (they require light).
– Allowing seedlings to dry out during early growth.
– Expecting flowers the first season from spring sowing.Patience is part of growing foxglove — the second-year bloom is worth it.
-
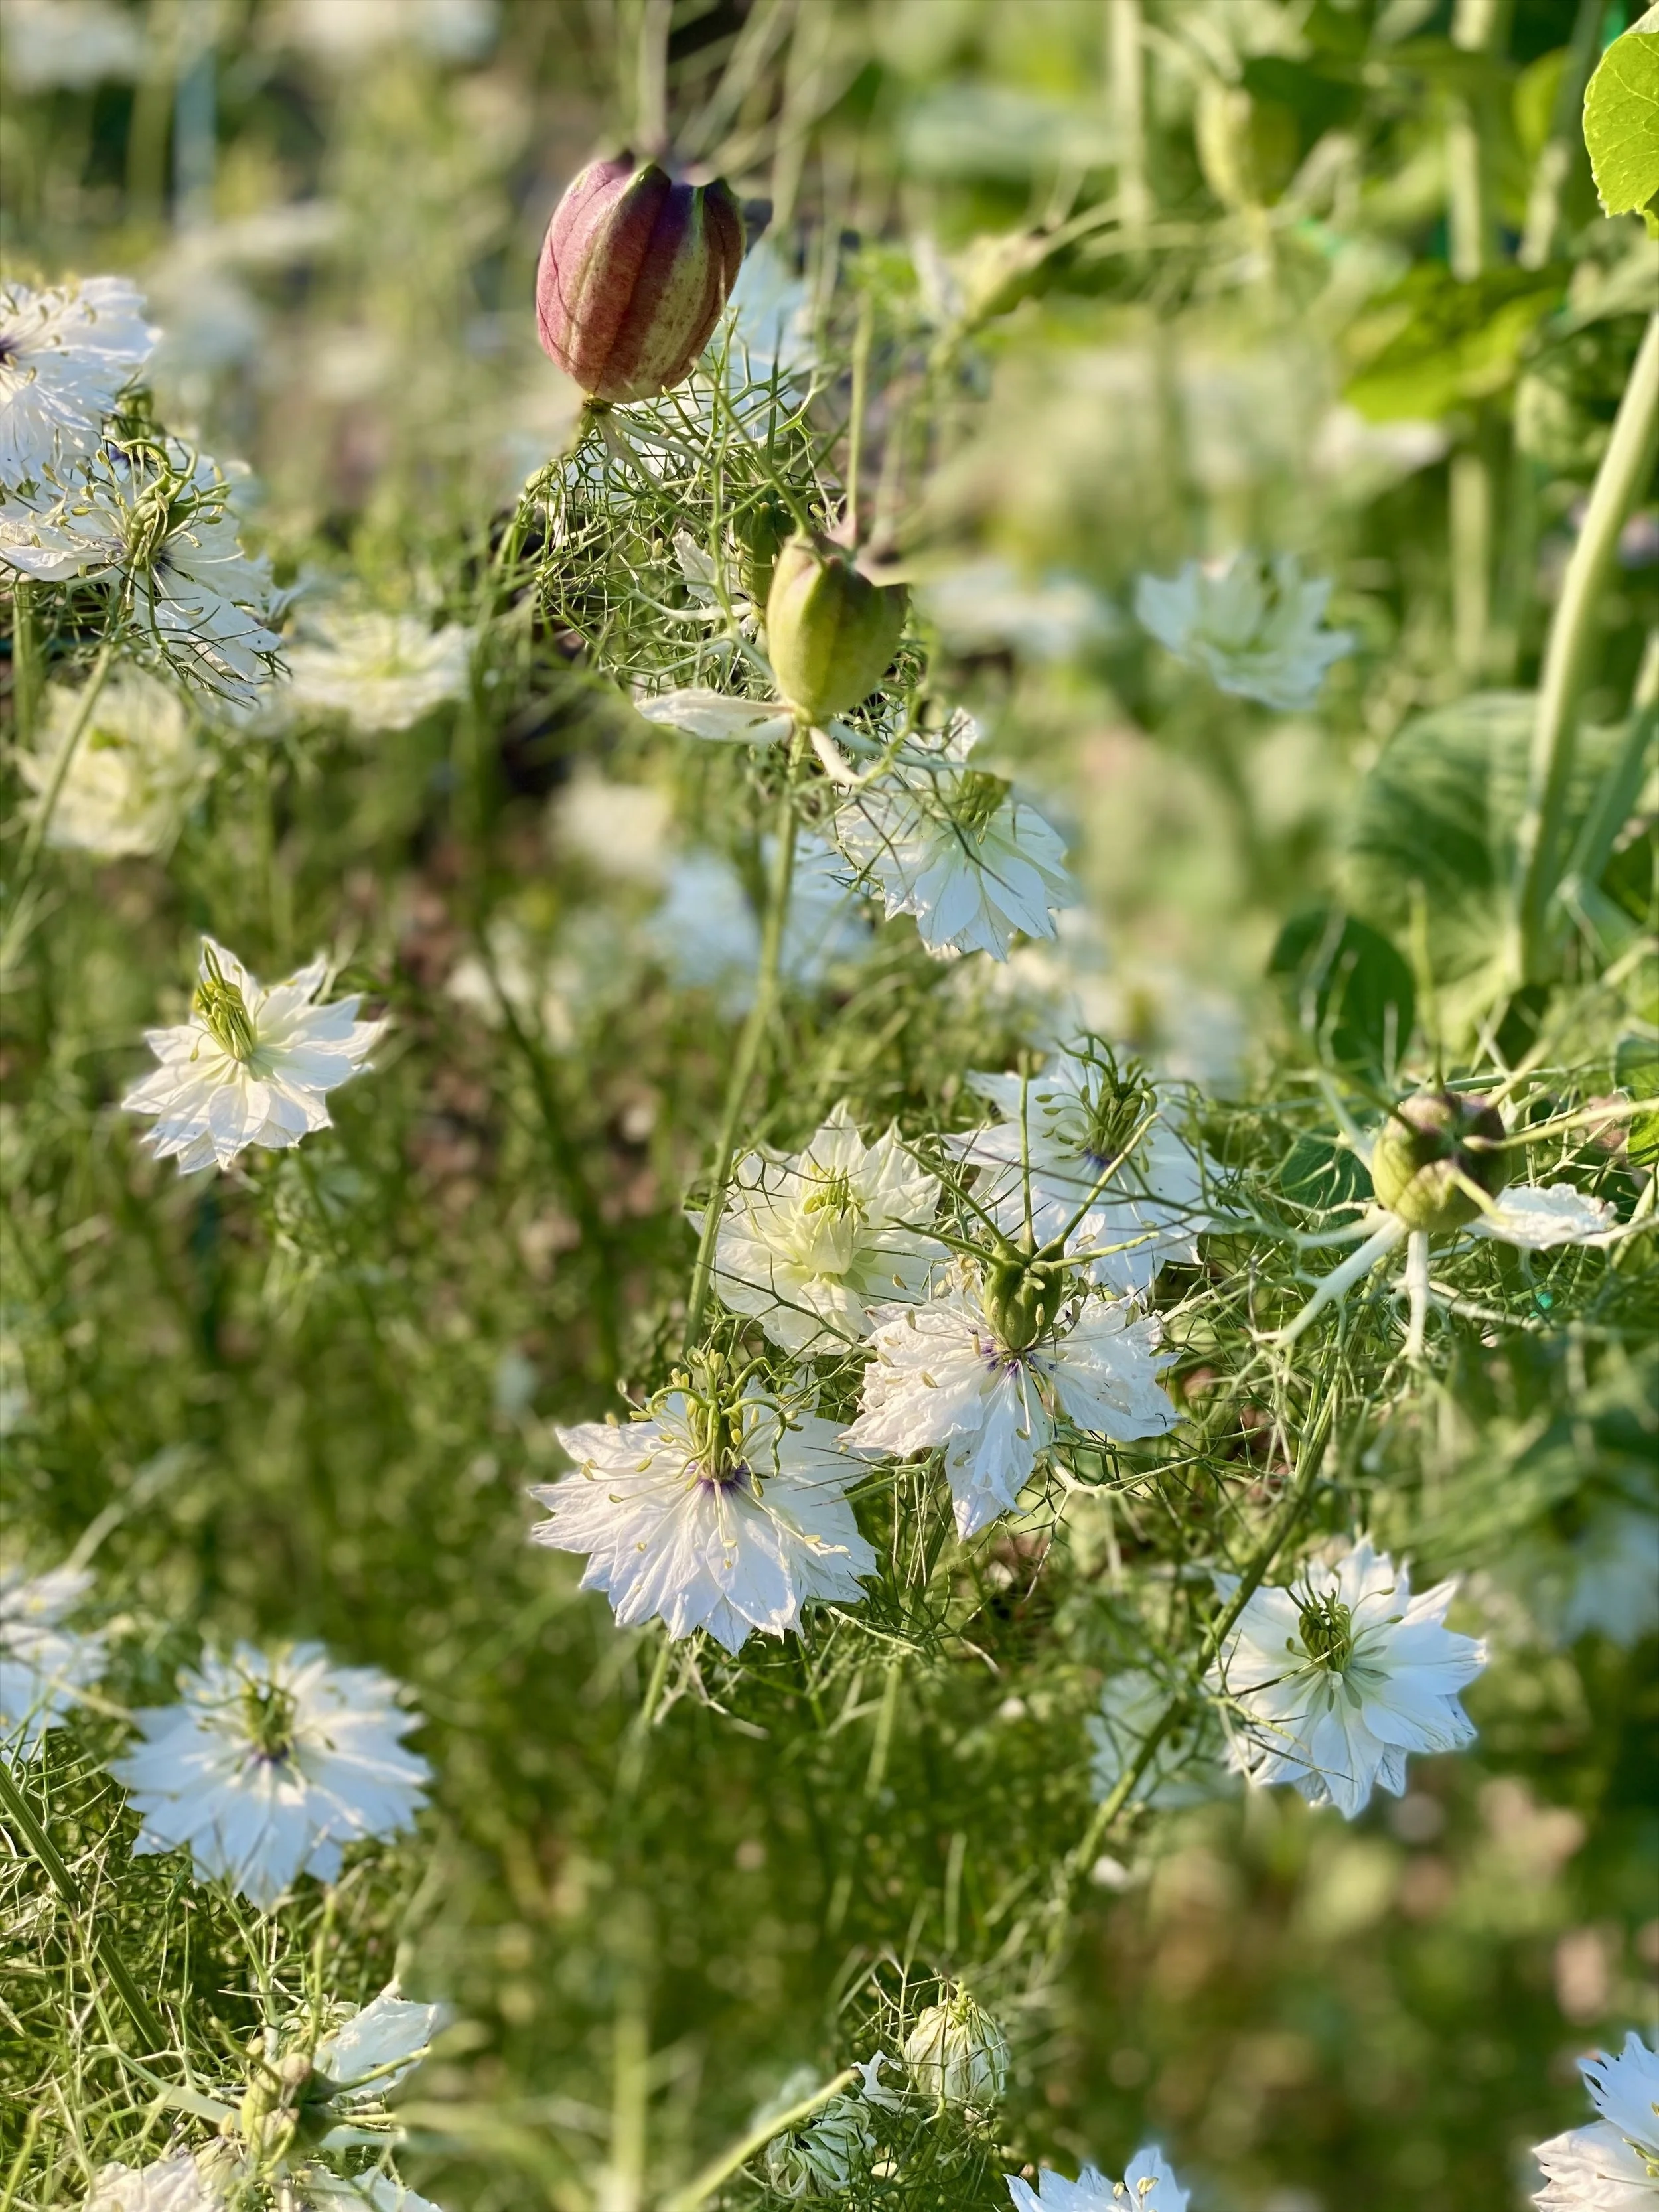
White Love-in-a-Mist
Direct Sow or Start Indoors?
Direct sowing is strongly recommended.
Nigella resents transplanting and performs best when sown directly into the garden in early spring as soon as soil can be worked.
In mild climates, fall sowing produces earlier blooms.
Sow ⅛–¼ inch deep. Germination occurs in 10–14 days.
For continuous blooms, succession sow every 2–3 weeks.
Zones
Annual in Zones 2–10.
Sun Exposure
Full sun to light shade.
Mature Size
Height: 18–24 inches
Width: 10–12 inchesAiry, fern-like foliage with delicate white blooms.
Spacing
Space 6–8 inches apart after thinning.
Pinching
Pinching is not necessary.
Allow plants to grow naturally for best flowering.Potting Up & Transplanting
Transplanting is not recommended. If started indoors, use biodegradable pots and disturb roots as little as possible.
Design Notes
‘Miss Jekyll Alba’ carries pure white blooms framed by soft, feathery foliage. After flowering, the seed pods form elegant balloon-like structures that dry beautifully.
It weaves gracefully between roses, foxglove, and cosmos and is especially effective in cottage-style plantings.
Excellent for fresh cutting and drying.
Pollinator Value
Attracts bees and beneficial insects.
Toxicity
Not considered toxic to humans or pets.
Common Mistakes to Avoid
• Transplanting large seedlings
• Overcrowding
• Over-fertilizingNigella thrives in average, well-drained soil.
What to Expect
Blooms late spring into early summer.
Seed pods add extended ornamental interest and can be harvested for drying.Light self-seeding may occur.
-
Campanula latifolia var. macrantha ‘Alba’
Giant White Bellflower
Direct Sow or Start Indoors?
Both methods are successful, but starting indoors offers stronger, more uniform plants.
For best results:
Sow outdoors in fall to allow natural cold stratification, or
Refrigerate seeds for 2–4 weeks before indoor sowing.
After stratification, start indoors 8–10 weeks before last frost. Surface sow or cover very lightly, as light improves germination.
Germination occurs in 14–28 days. Keep soil evenly moist but not soggy.
Transplant carefully while young.
Zones
USDA Zones 3–8
Perennial.Sun Exposure
Full sun to part shade.
In warmer climates, afternoon shade is beneficial.Mature Size
Height: 36–48 inches
Width: 18–24 inchesTall, upright stems with large, open white bells.
Spacing
Space 18–24 inches apart to allow airflow and prevent crowding.
Pinching
Pinching is not necessary.
Deadhead spent blooms to encourage extended flowering and tidy growth.Potting Up & Transplanting
Pot up if needed before planting outdoors. Avoid disturbing roots once established.
Campanula forms a strong root system and settles in quickly once planted.
Design Notes
‘Alba’ brings vertical elegance to white and woodland-inspired borders. Its large, open bells feel refined rather than delicate.
It pairs beautifully with:
Excellent for layered borders where mid-to-back height structure is needed.
Pollinator Value
Attractive to bees and beneficial insects.
Toxicity
Not considered toxic to humans or pets.
Common Mistakes to Avoid
Skipping cold stratification
Planting in dense, poorly drained soil
Overcrowding
Campanula prefers well-drained soil and moderate fertility.
What to Expect
Blooms in early to mid-summer.
Forms clumps that increase gradually over time.May self-seed lightly in favorable conditions.
-
White Coneflower
Direct Sow or Start Indoors?
Start indoors 8–10 weeks before last frost for strongest results.
Cold stratification improves germination. Refrigerate seeds in moist medium for 2–4 weeks before sowing.
Sow indoors and lightly cover. Germination occurs in 10–20 days.
May also be direct sown in fall or early spring.
Zones
USDA Zones 3–9
Perennial.Sun Exposure
Full sun.
Mature Size
Height: 24–36 inches
Width: 18–24 inchesUpright, sturdy stems.
Spacing
Space 18–24 inches apart.
Pinching
Pinching not required.
Deadheading prolongs bloom; leaving seed heads supports wildlife.Potting Up & Transplanting
Transplant once seedlings are sturdy.
Tolerates average garden soil but prefers well-drained conditions.Design Notes
‘White Swan’ softens traditional purple coneflower plantings and pairs beautifully with:
• Lavender
• Eryngium
• Cosmos
• Ornamental grassesExcellent in pollinator gardens and late-summer borders.
Seed heads provide winter interest.
Pollinator Value
Highly attractive to bees, butterflies, and beneficial insects.
Toxicity
Not considered toxic to humans or pets.
Common Mistakes to Avoid
• Skipping stratification
• Overwatering young plants
• Planting in shadeEchinacea thrives in sun and tolerates drought once established.
What to Expect
Blooms in mid to late summer.
Long-lived perennial with strong winter presence. -
White Seaside Daisy
Direct Sow or Start Indoors?
Start indoors 8–10 weeks before last frost or sow directly after danger of frost.
Surface sow or lightly cover. Requires light for strong germination.
Germination occurs in 10–20 days.
Prefers cool conditions during early growth.
Zones
USDA Zones 6–10
Perennial in mild climates.Sun Exposure
Full sun to light shade.
Mature Size
Height: 12–18 inches
Width: 12–24 inchesLow-growing, spreading habit.
Spacing
Space 12–18 inches apart.
Pinching
Not required.
Light shearing after first bloom encourages reblooming.Potting Up & Transplanting
Transplant once sturdy. Prefers well-drained soil.
Excellent for containers, borders, and rock gardens.
Design Notes
Widely used in European gardens, this airy white daisy softens edges and spills beautifully into cracks and planters.
It pairs elegantly with:
• Lavender
• Eryngium
• Ornamental grasses
• Cottage bordersLong blooming and subtly romantic.
Pollinator Value
Attractive to bees and butterflies.
Toxicity
Not considered toxic to humans or pets.
Common Mistakes to Avoid
• Poor drainage
• Overwatering
• Heavy fertilizationThrives in lean, well-drained soil.
What to Expect
Blooms late spring through summer with light trimming.
Forms a tidy, spreading mound. -
White English Lavender
Direct Sow or Start Indoors?
Start indoors for best results.
Lavender benefits from cold stratification. Refrigerate seeds in a lightly moist medium for 2–4 weeks before sowing.
After stratification, sow indoors 10–12 weeks before last frost. Lightly cover with fine soil or vermiculite — seeds require light but also consistent surface moisture.
Improved germination strain. Stratification still recommended for best results.
Germination can be slow and irregular, often taking 14–28 days or longer. Warm soil (65–70°F) improves success.
Transplant carefully once seedlings are sturdy and frost danger has passed.
Zones
USDA Zones 5–9
Perennial.Sun Exposure
Full sun is essential.
Poor flowering results in shade.Mature Size
Height: 18–24 inches
Width: 18–24 inchesCompact, mounding form.
Spacing
Space 18–24 inches apart to ensure airflow and prevent fungal issues.
Pinching
Lightly pinch young plants once established to encourage branching.
Avoid heavy pruning in the first year.
Potting Up & Transplanting
Lavender dislikes wet roots. Use well-draining soil and avoid overwatering.
Transplant when plants have several true leaves and strong stems.
Design Notes
White lavender softens traditional purple plantings and reads beautifully in moon gardens and white-themed borders.
It pairs naturally with:
• Eryngium
• White cosmos
• Nigella
• Roses
• Silver foliage plantsFragrant blooms attract pollinators and dry beautifully.
Pollinator Value
Highly attractive to bees and beneficial insects.
Toxicity
Generally considered non-toxic to humans and pets.
Common Mistakes to Avoid
• Skipping stratification
• Overwatering
• Heavy, poorly drained soil
• Over-fertilizingLavender thrives in lean, well-drained conditions.
What to Expect
Slow to establish in year one.
Full bloom performance improves significantly in year two and beyond. -
Papaver rhoeas ‘Bridal Silk’
Shirley Poppy — Soft Blush to Ivory
Direct Sow or Start Indoors?
Direct sowing is strongly preferred.
Poppies dislike root disturbance and perform best when sown directly into prepared garden soil. Sow in early spring as soon as soil can be worked, or in fall in mild climates for earlier blooms.
Scatter seed thinly over loosened soil and press lightly. Do not cover deeply — light aids germination.
Germination occurs in 10–21 days. Keep soil lightly moist during establishment.
Thin seedlings carefully to allow space for airflow.
Zones
Annual in Zones 2–10.
Sun Exposure
Full sun.
Mature Size
Height: 24–30 inches
Width: 8–12 inchesGraceful stems with papery, translucent blooms.
Spacing
Thin to 8–10 inches apart.
Overcrowding reduces bloom size and airflow.Pinching
Pinching is not recommended.
Allow plants to grow naturally for best flowering.Potting Up & Transplanting
Transplanting is not recommended. If starting indoors, use biodegradable pots and transplant very young seedlings with minimal disturbance — but direct sowing is more reliable.
Design Notes
‘Bridal Silk’ carries soft ivory and blush-tinted blooms with silky, crinkled petals that catch the light beautifully. The effect is romantic rather than bold — more whisper than shout.
It pairs elegantly with:
• Nigella
• White cosmos
• Foxglove
• Soft apricot or blush tulips
• Airy grassesAfter flowering, the seed pods remain ornamental and can be dried for arrangements.
Because of their delicate stems, poppies are best woven through borders rather than planted in rigid rows.
Pollinator Value
Attractive to bees and beneficial insects.
Toxicity
Not considered toxic to humans or pets, though not intended for consumption.
Common Mistakes to Avoid
• Transplanting mature seedlings
• Overwatering
• Rich, heavily fertilized soilPoppies bloom best in lean, well-drained conditions.
What to Expect
Blooms in late spring to early summer.
Seed pods follow flowering and may self-seed lightly in favorable conditions.Allow some pods to mature if you’d like them to return.